

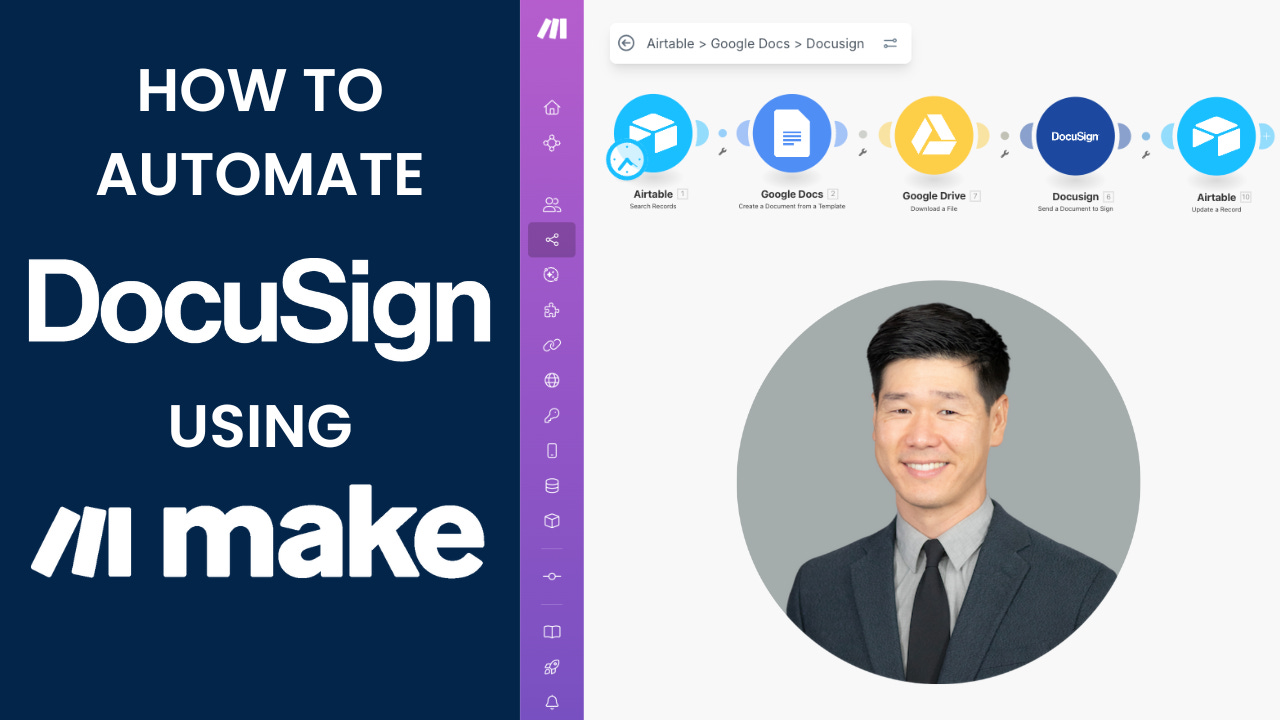
How to Automate DocuSign with Make.com and Airtable
(and why building automations helped me reclaim my time)

If you’re new to Airtable or Make.com, you can sign up for Airtable here or create your free Make.com account here.
*These are affiliate links — which means I may receive a small commission if you use them, at no additional cost to you. It’s a simple way to support my work while learning how to systematize yours.
There’s a quiet kind of relief that comes when something that used to take hours now happens automatically.
For me, it was the day I watched a contract send itself.
If you’ve ever felt the slow drag of manual admin work — updating spreadsheets, uploading documents, emailing reminders — you know the feeling. The small tasks that once seemed “simple” become a slow leak in your day.
That’s what pushed me to start automating my contract process using Make.com, Airtable, and DocuSign.
This post walks through the exact setup I show in my YouTube tutorial — so if you’re more of a visual learner, you can watch it here to see each step in action.
Why Automate Contracts with Make.com and DocuSign
For most consultants and small teams, contract management sits somewhere between necessary and tedious. Every client needs a signed agreement, but it shouldn’t require twenty steps every time.
Automation doesn’t just save time — it protects your attention. It frees you to focus on the work that actually moves your organization forward.
Step 1: Build Your Airtable Contract Tracker
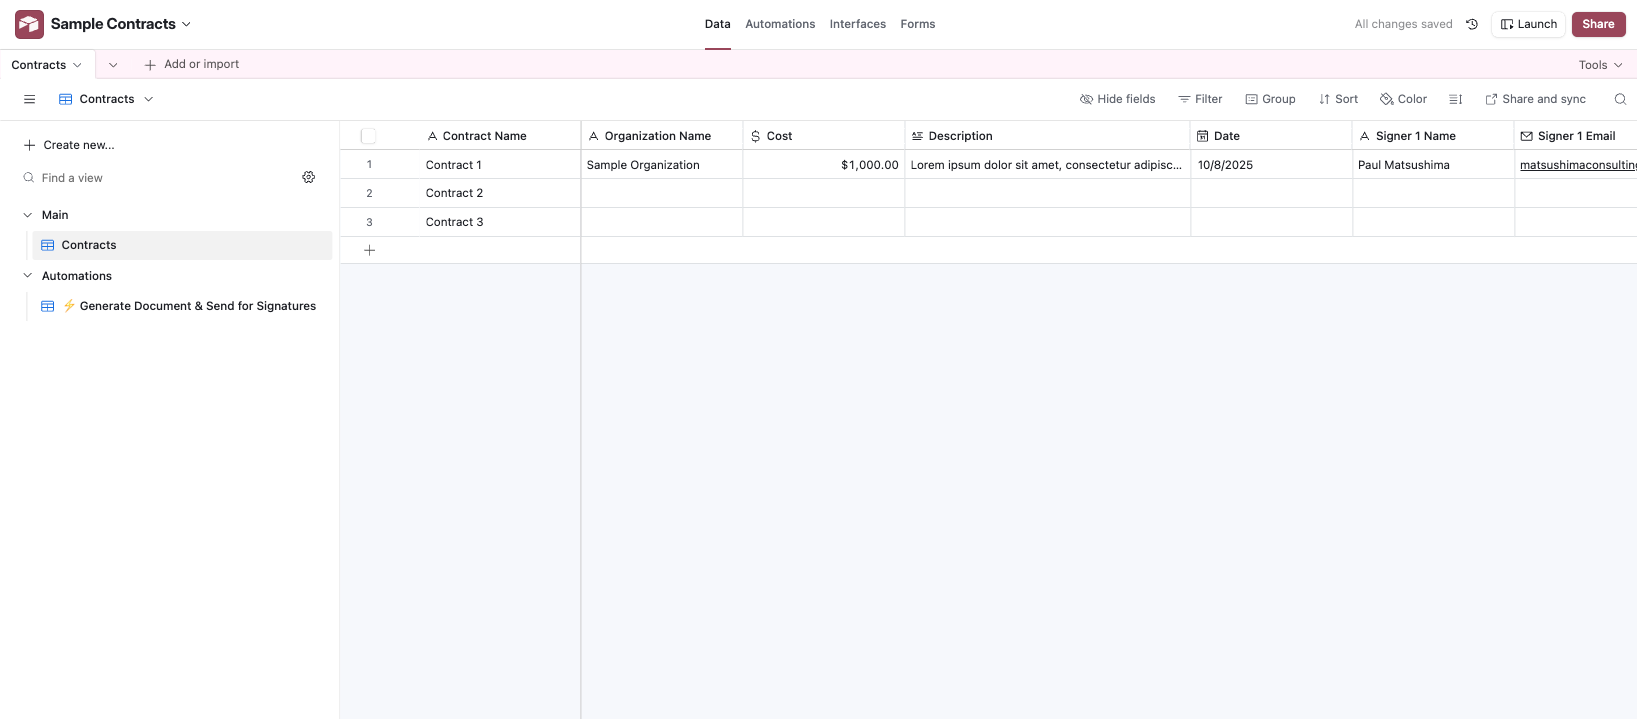
I started by creating a simple Airtable base structured for contracts.
Here are the fields you’ll need:
Contract Name
Organization Name
Cost of Contract
Date
Signer 1 Name & Email
Signer 2 Name & Email
DocuSign Envelope ID
Contract Draft URL
Signed Contract URL
Status — the field that triggers the automation
Then, I created a view filtered by the Status field. When a record’s status reads “Yes — Send Now,” it enters that view — which automatically triggers the Make.com scenario.
Step 2: Create the Contract Template in Google Docs
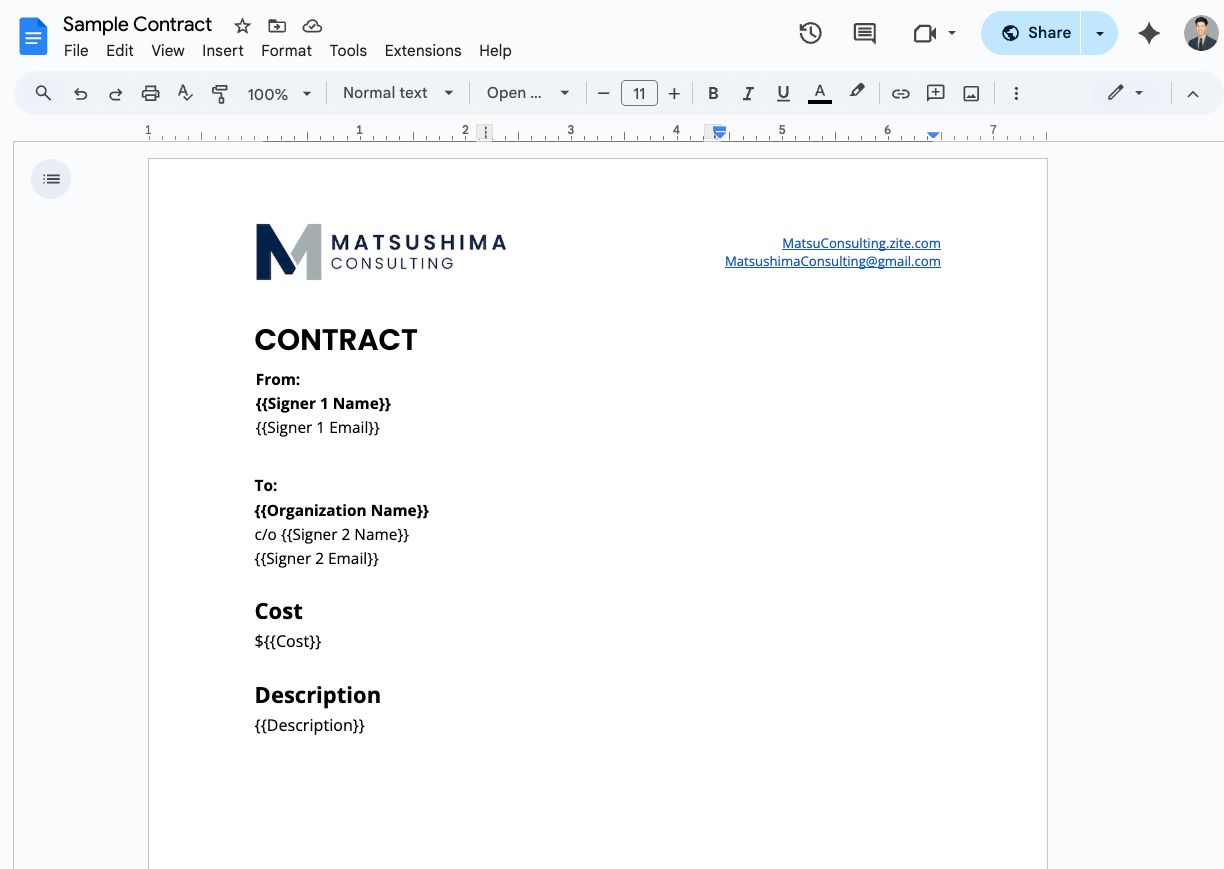
Next, I built a Google Docs template for the contract. This document includes placeholders (called “merge fields” or “merge tags”) (like {{Organization Name}} or {{Signer 1 Email}}) that Make.com later fills automatically with data from Airtable.
Important Note about DocuSign fields:
Unless you’re using a DocuSign template, DocuSign won’t automatically know where to drop a signature.
That means you’ll need to:
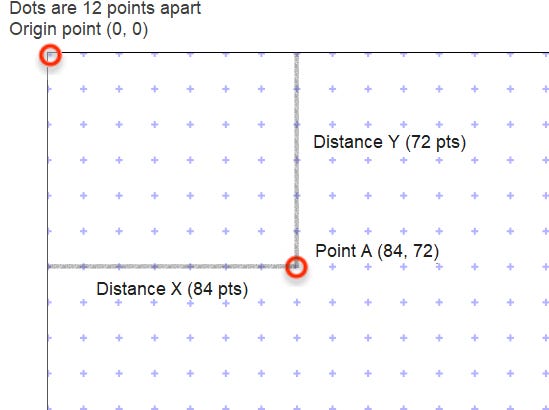
Upload a copy of the document into DocuSign
Locate the X and Y coordinates for the signature field
Manually set where the signature will land
Check out this article to identify the X and Y coordinates in a DocuSign document
For the “Date Signed” field, you can use an Anchor String — a hidden white-text marker in Google Docs that tells DocuSign where to place the date.
Because of this, I recommend putting the signature section on a separate page. If your contracts vary in length, this ensures the signature coordinates stay consistent.
Step 3: Understanding DocuSign Fields
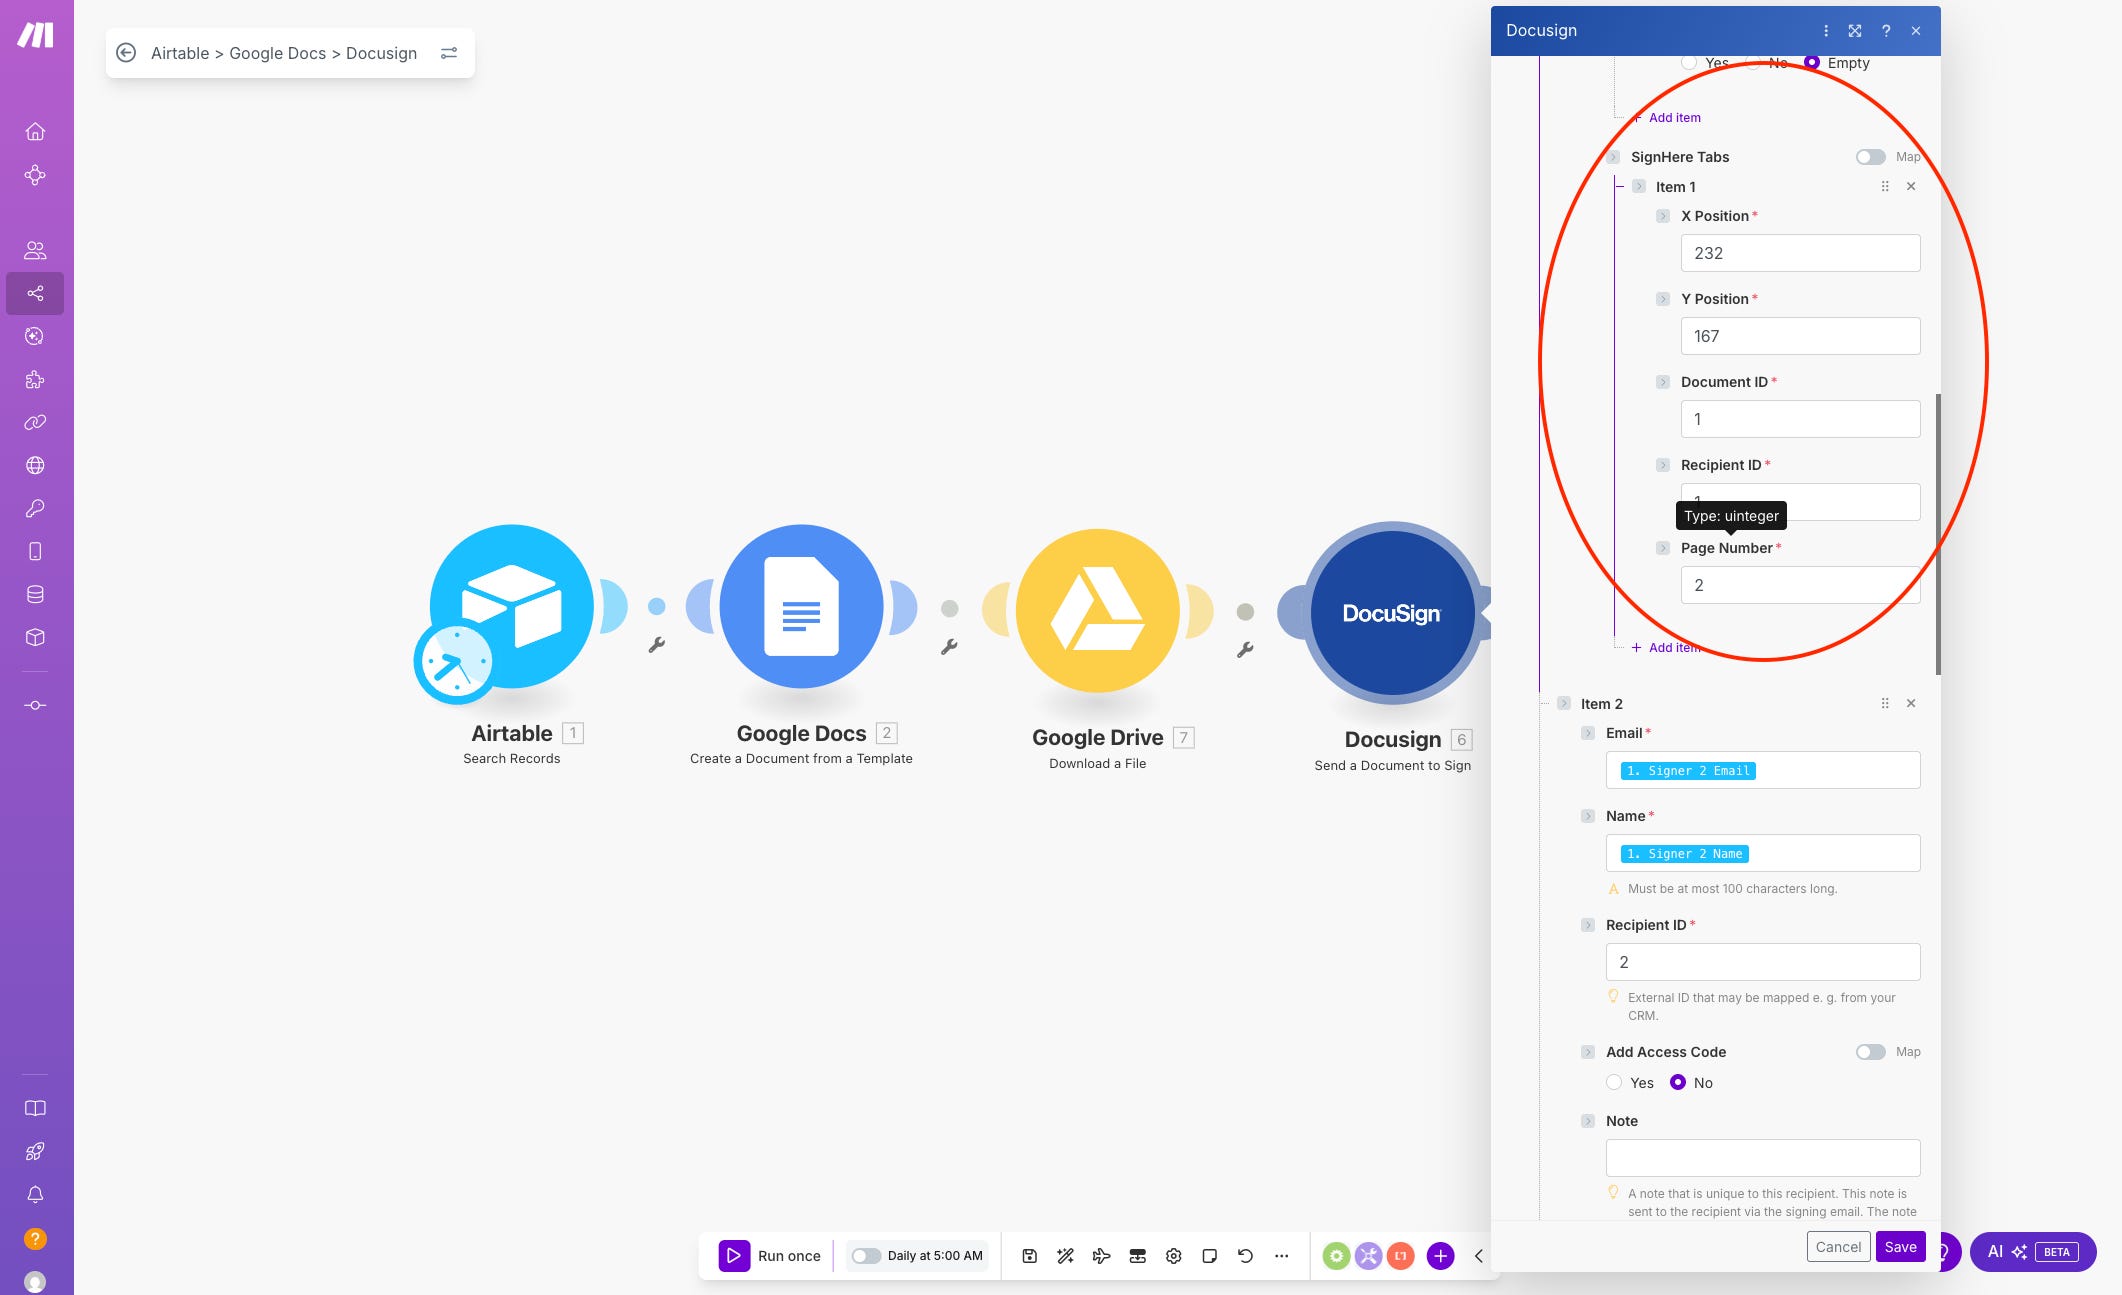
When you begin building the DocuSign module in Make.com, here are a few quick clarifications that saved me hours of troubleshooting:
Document ID:
If there’s only one document, it’s always 1.
If you’re sending multiple documents at a time (such as an invoice and contract) and signatures belong on the second document, use 2.Recipient ID:
This refers to who is signing — not necessarily the order.
The first signer is Recipient 1, the second is Recipient 2, and so on.Page Number:
This determines where the signature and date signed fields appears.
If signatures go on page 2, enter 2.
These details help Make.com and DocuSign “talk” to each other correctly.
Step 4: Connect Make.com, Airtable, and DocuSign
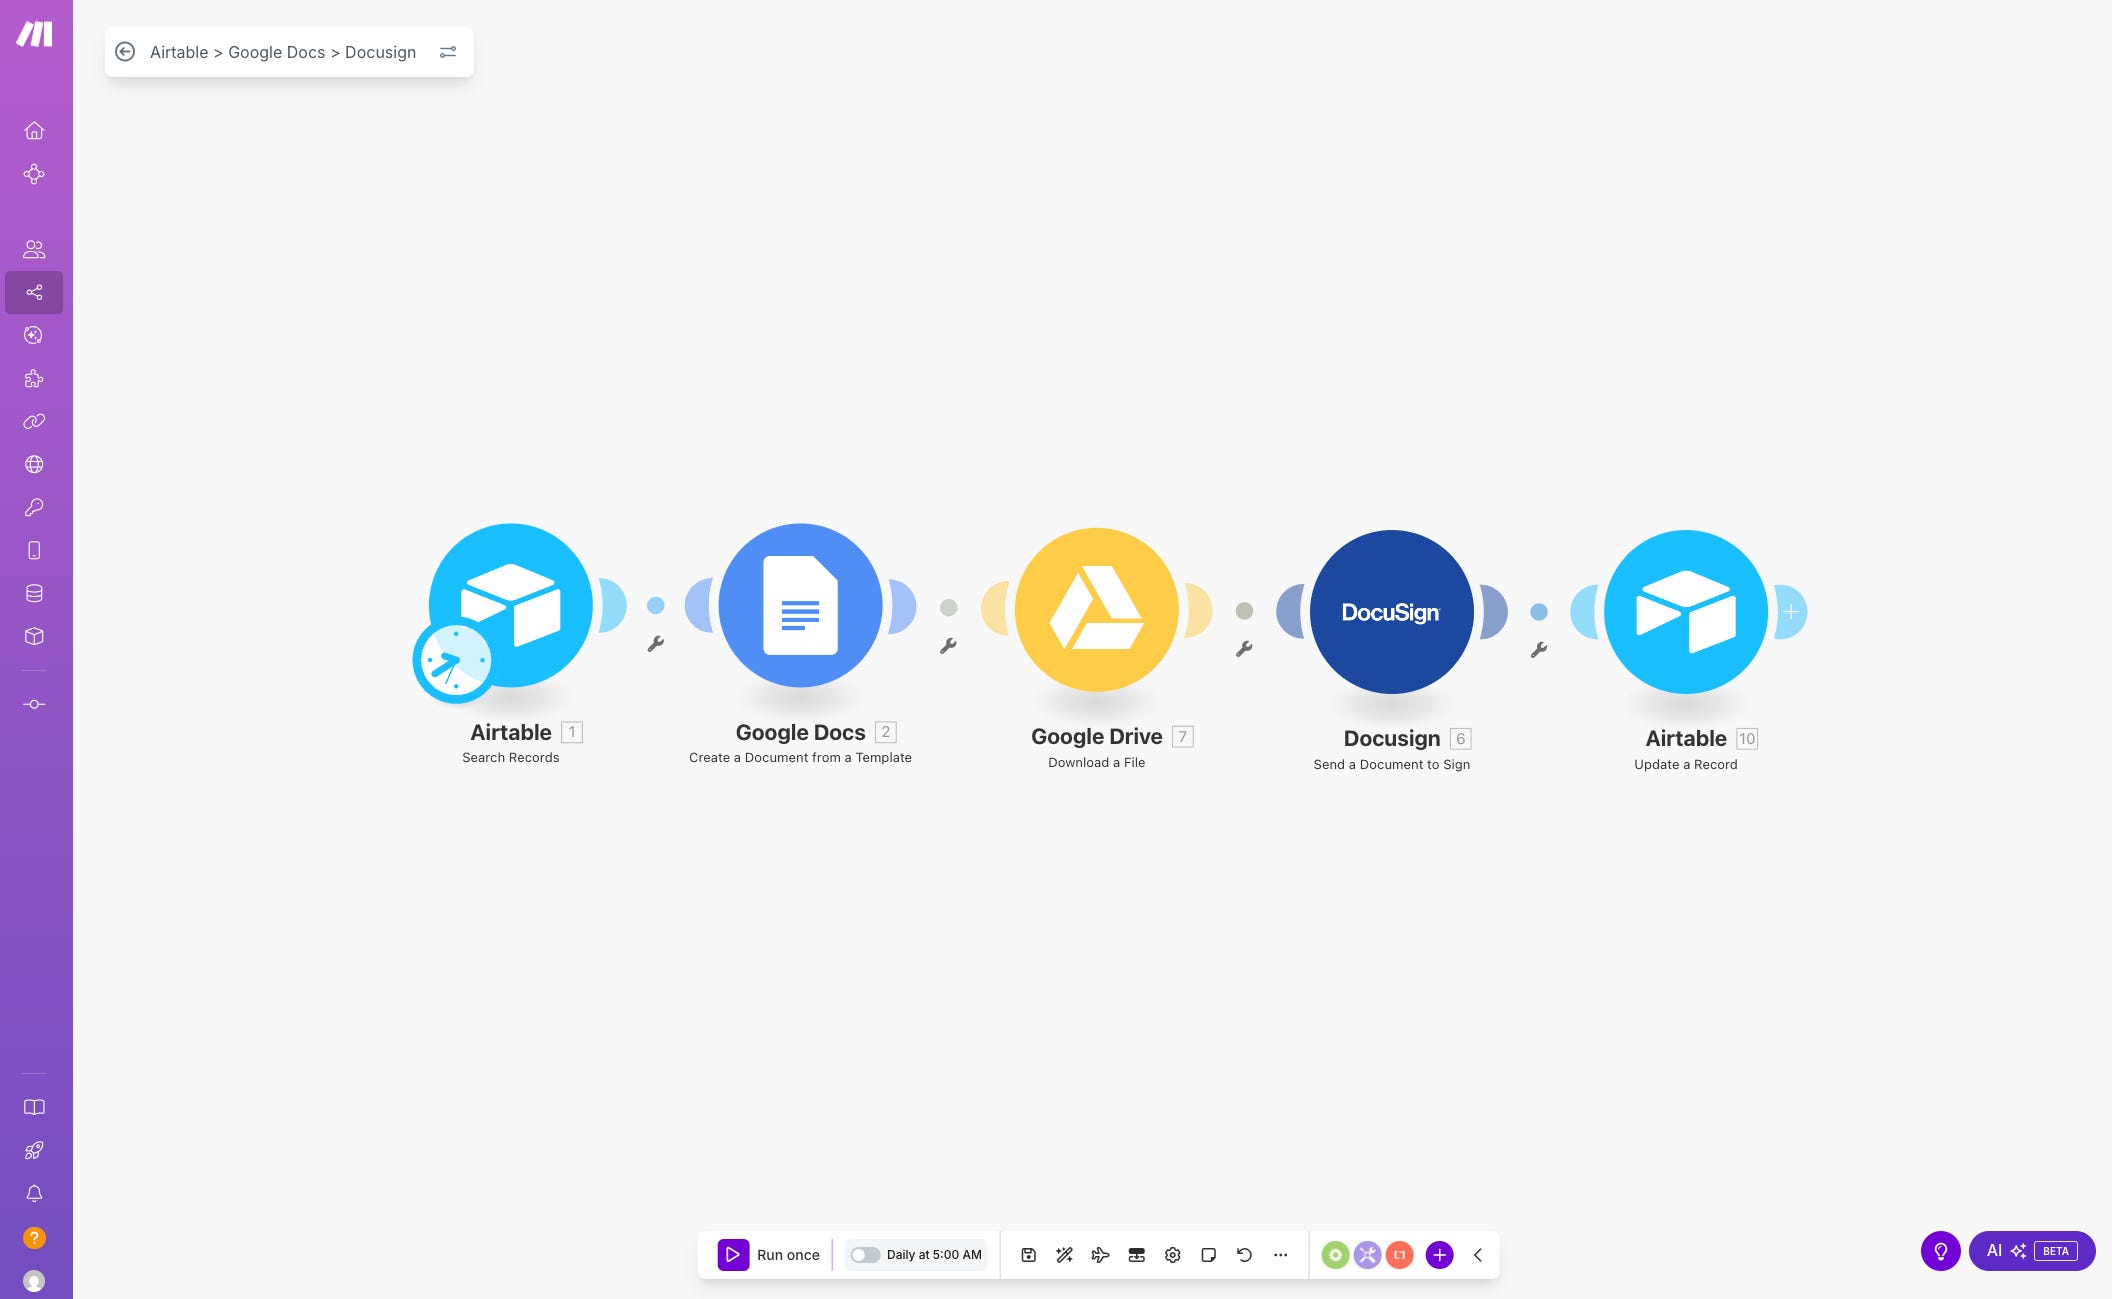
Now comes the fun part — the Make.com automation.
Here’s the workflow I set up:
Trigger: Airtable “search records” module, when a record enters the “Yes — Send Now” view.
Create a Google Template: Make.com pulls data from Airtable and fills the Google Docs template.
Download a Document: Google Drive will download a copy of the document generated in step two.
Send a DocuSign envelope: The document is uploaded to DocuSign and emailed to the correct signers.
Update a Record in Airtable:
Insert the Google Docs share link into the “Contract Draft URL” field.
Add the DocuSign Envelope ID into Airtable for tracking.
And that’s it — the full process from draft to signature request runs automatically.
Step 5: Watch It in Action
To wrap up, I show what happens next: a DocuSign email lands in my inbox, prompting me to sign the contract.
That notification — once the product of a dozen manual steps — now appears like clockwork. Every time I see it, I feel that same small satisfaction: this is what it means to work smarter, not harder.
Final Thoughts: Build Systems That Serve You
Automation isn’t about removing the human element. It’s about creating space — for focus, creativity, and the kind of work that actually gives life. When the busywork runs on its own, you can finally turn your attention to what matters most.
If you’d like to see this process in action, watch my YouTube tutorial here.
And if you want help setting up similar systems in your own organization, visit my website and book a free discovery call (link below!) to see how I can help you streamline your operations.
Because the best systems don’t just make things faster. They make room for what truly matters.